See Our UV Stone Repair Kit in Action
See Our UV Stone Repair Kit in Action
When your customer calls you in a panic that they have a chip, gouge, or crack in their granite countertop, get ready to impress when you quickly and easily fix the problem with our UV Stone Repair Kit.
Our sales team just released a new video demonstrating how simple this repair kit is to use, and the pretty amazing results that you can obtain with just a little bit of time and effort.
Take a look at the video here.
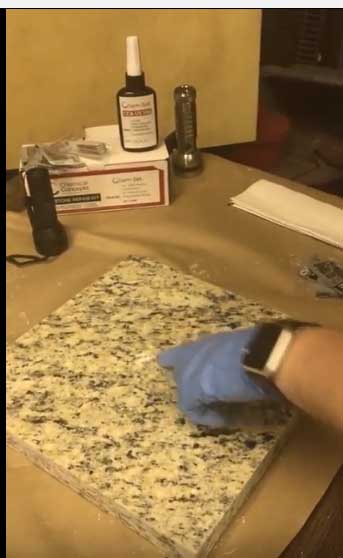
Andrew from the Chemical Concepts sales team did some (purposeful) damage to a piece of granite countertop – like whacking it with a hatchet! – to show just how well this kit will perform.
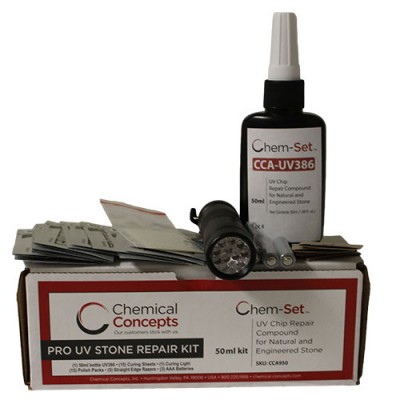
What’s Included in Our UV Stone Repair Kit?
- 50ml Bottle UV386
- 15- Cure sheets
- 15- Polishing packs
- 1- LED Flashlight
- 3- AAA batteries
- 5- Straight edge razors
As you can see in this video, this is one beat up piece of granite with gouges and scratches.
 Here’s the Process
- Here’s a quick rundown of the process that Andrew demonstrates to repair a deep gouge:
- Use an air blower or canned air to remove dust.
- Clean the area with rubbing alcohol – you need to make sure there are no oils, debris or dust to interfere with the bonding of the UV-386.
- Generously fill the mark in the granite with our UV-386 product.
- Place a curing sheet on top of the product. This will prevent the glue from sticking to the flashlight and provides a nice level surface to work with.
- Shine the UV flashlight on the repaired area. With small repair, you can rest the flashlight right on the area. Larger repairs might require you to keep the light moving or consider investing in a larger UV lamp. The time needed with the light depends on the type of light that you use. (Note: always wear UV protective glasses when working with UV lights!)
- Now you’ll use a straight razor shave off any excess product and smooth the countertop surface. Use the straight razor at a perpendicular angle in a back and forth motion so as not to pull up the adhesive. If you get a little too aggressive or pull a bit of the adhesive off, it might require more than one application.
- After level, use the polishing packs by adding to a paper towel or a lint-free cloth. Rub the polish in a circular motion over the affected area to blend it in.
You can see from the video that the repair is nearly invisible!
If you’d like a printed version of the instructions to keep, you can download it here.
The Benefits of Our Kit Over the Competitors
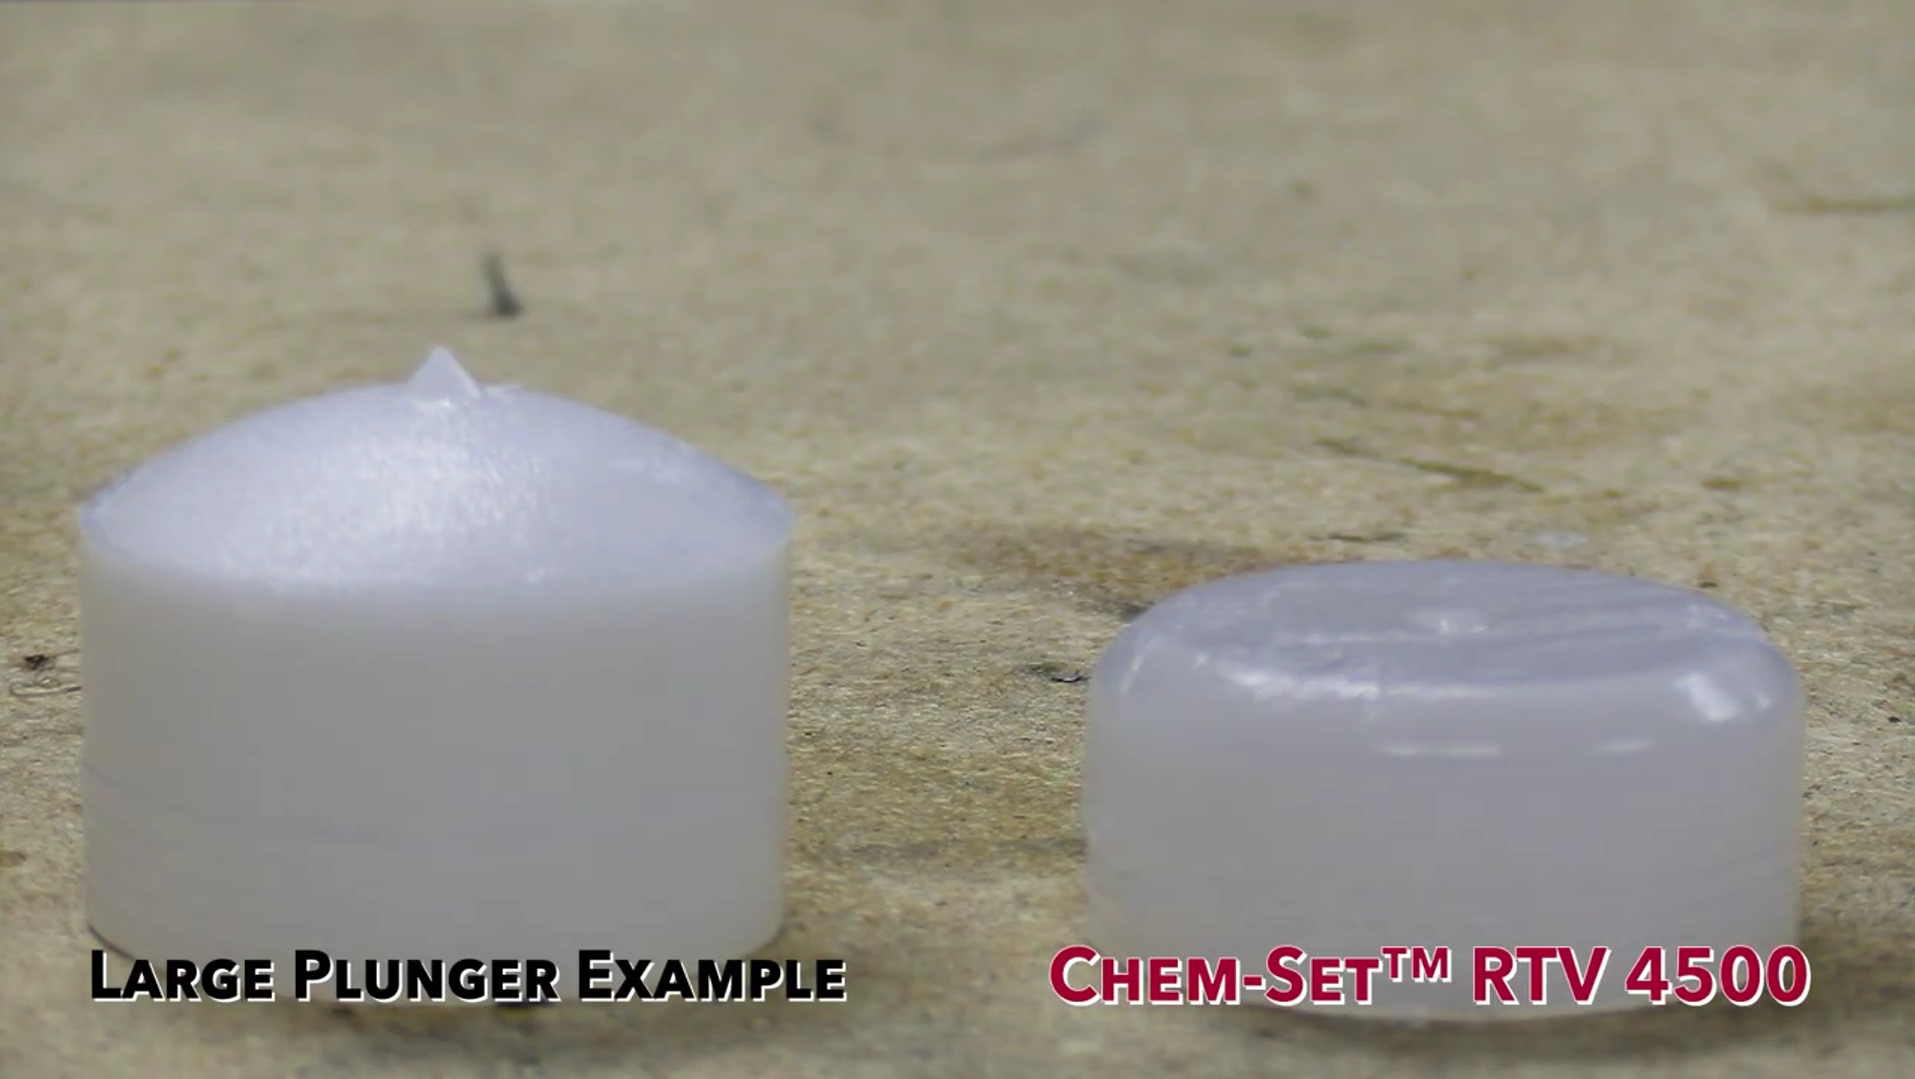
Value – Our UV Stone Repair Pro Kit comes with large 50 ml bottle. You’ll find that many other UV kits come with small syringes (2 ml) of product. Even if you get 6 syringes in the kit, our kit supplies you with nearly 5 times more product….and a much better value.
No “Bloom” – You might have seen some glue based repair kits with accelerators on the market. While they’re acceptable products, be aware that on certain stones (especially many lighter ones) you might get a bloom or blossom effect with a green tinge to the repaired area. The UV kits (with no accelerator) won’t cause that type of issue.
A quick look at this video shows the ease of use and the amazing results from our UV Stone Repair kit. Are you ready to see for yourself? Contact us today – 800-220-1966 or [email protected].