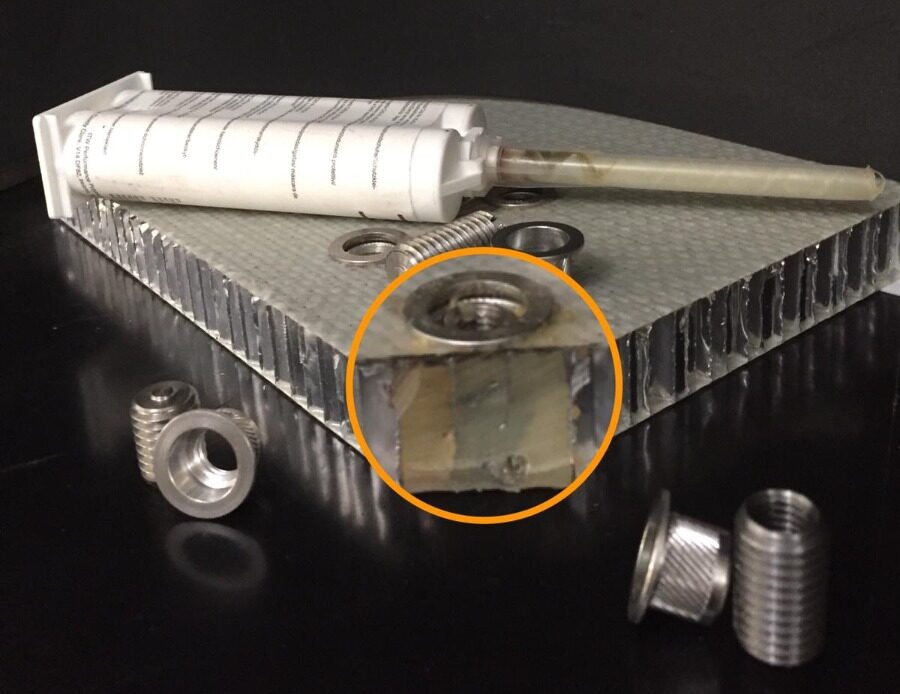
Honeycomb Panel Anchors - Deform-Nut TC/SC 1
Sizing & Selection
Choose the correct TC/SC1 based on skin thickness, overall panel thickness, and desired thread size.
📄 Download Deform-Nut® TC/SC1 Sizing & Selection Flyer (PDF)
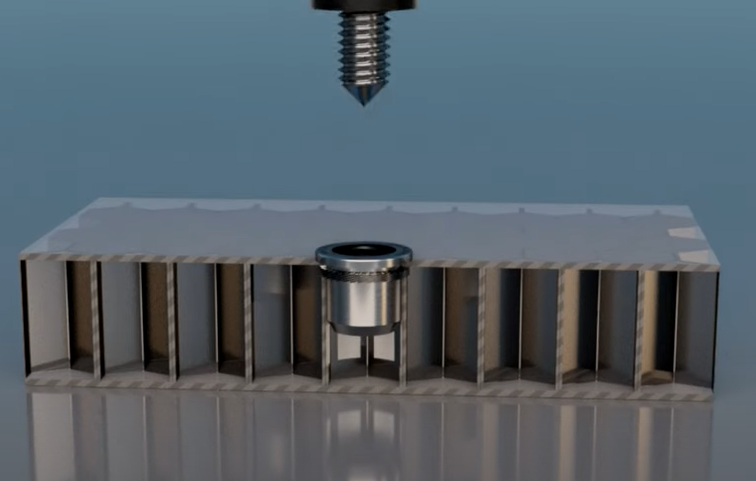
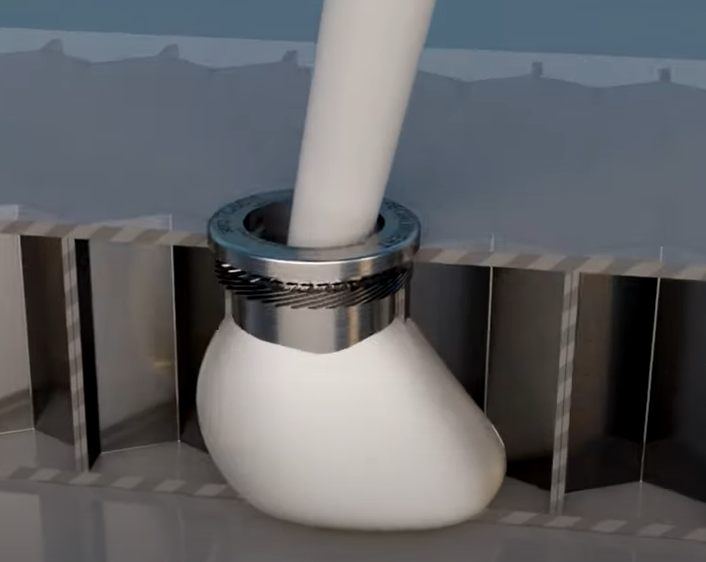
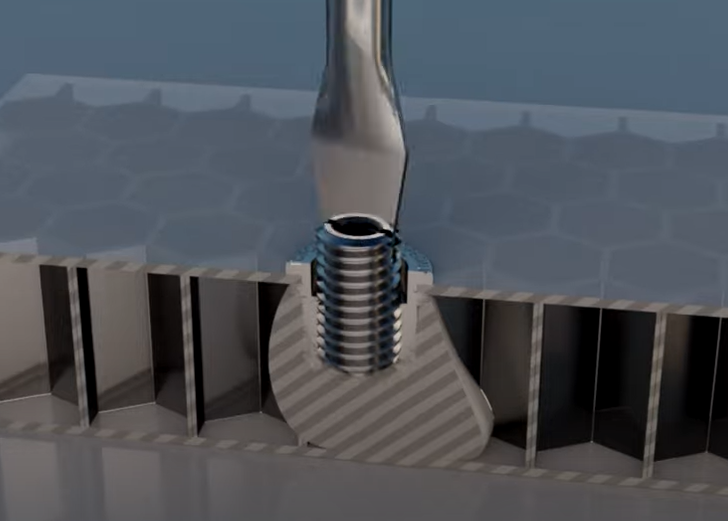
Installation — 3 Simple Steps
Note: Full strength depends on adhesive selection, temperature, and joint design.
How It Works — Short Videos
See how the Deform-Nut® TC/SC1 system combines mechanical anchoring and adhesive potting to create strong, reusable threads.
Tools & Accessories You May Need
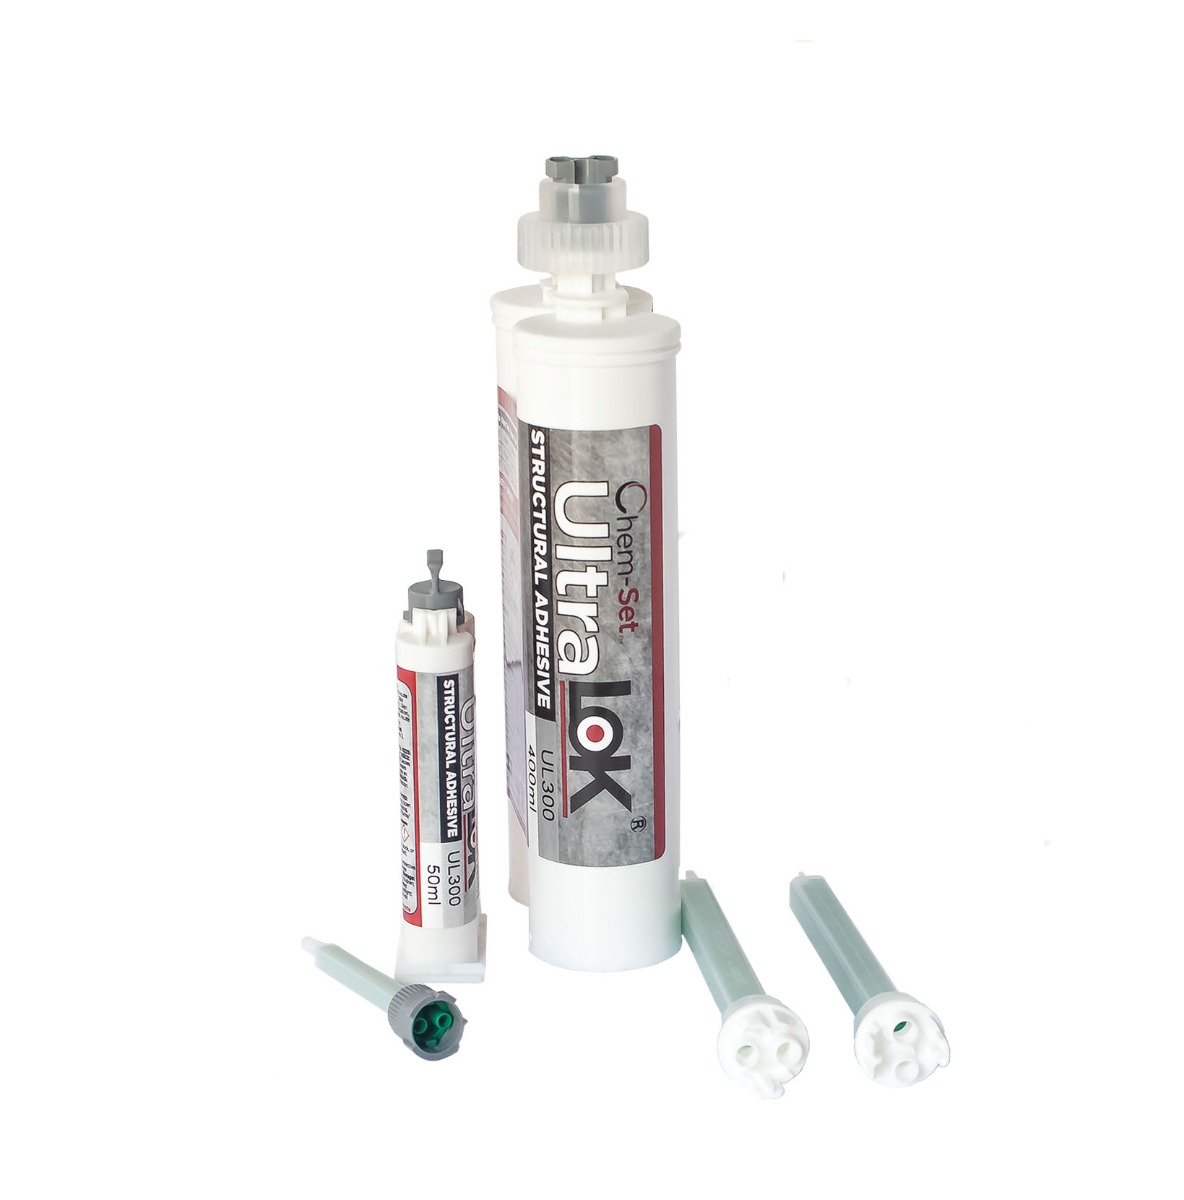
- Potting Adhesive: Ultralok 300 MMA (Fast MMA recommended for Step 2 injection).
- 13 mm Cutter Bit: Hole cutter specialized for honeycomb panels.
- Rivet-Nut Tools: Available in Hand, Battery & Pneumatic options for setting the TC body securely.
Sizing & Selection
Choose the correct TC/SC1 based on skin thickness, overall panel thickness, and desired thread size.
📄 Download Deform-Nut® TC/SC1 Sizing & Selection Flyer (PDF)
Installation — 3 Simple Steps
Note: Full strength depends on adhesive selection, temperature, and joint design.
How It Works — Short Videos
See how the Deform-Nut® TC/SC1 system combines mechanical anchoring and adhesive potting to create strong, reusable threads.
Tools & Accessories You May Need
- Potting Adhesive: Ultralok 300 MMA (Fast MMA recommended for Step 2 injection).
- 13 mm Cutter Bit: Hole cutter specialized for honeycomb panels.
- Rivet-Nut Tools: Available in Hand, Battery & Pneumatic options for setting the TC body securely.
Showing all 7 results
-

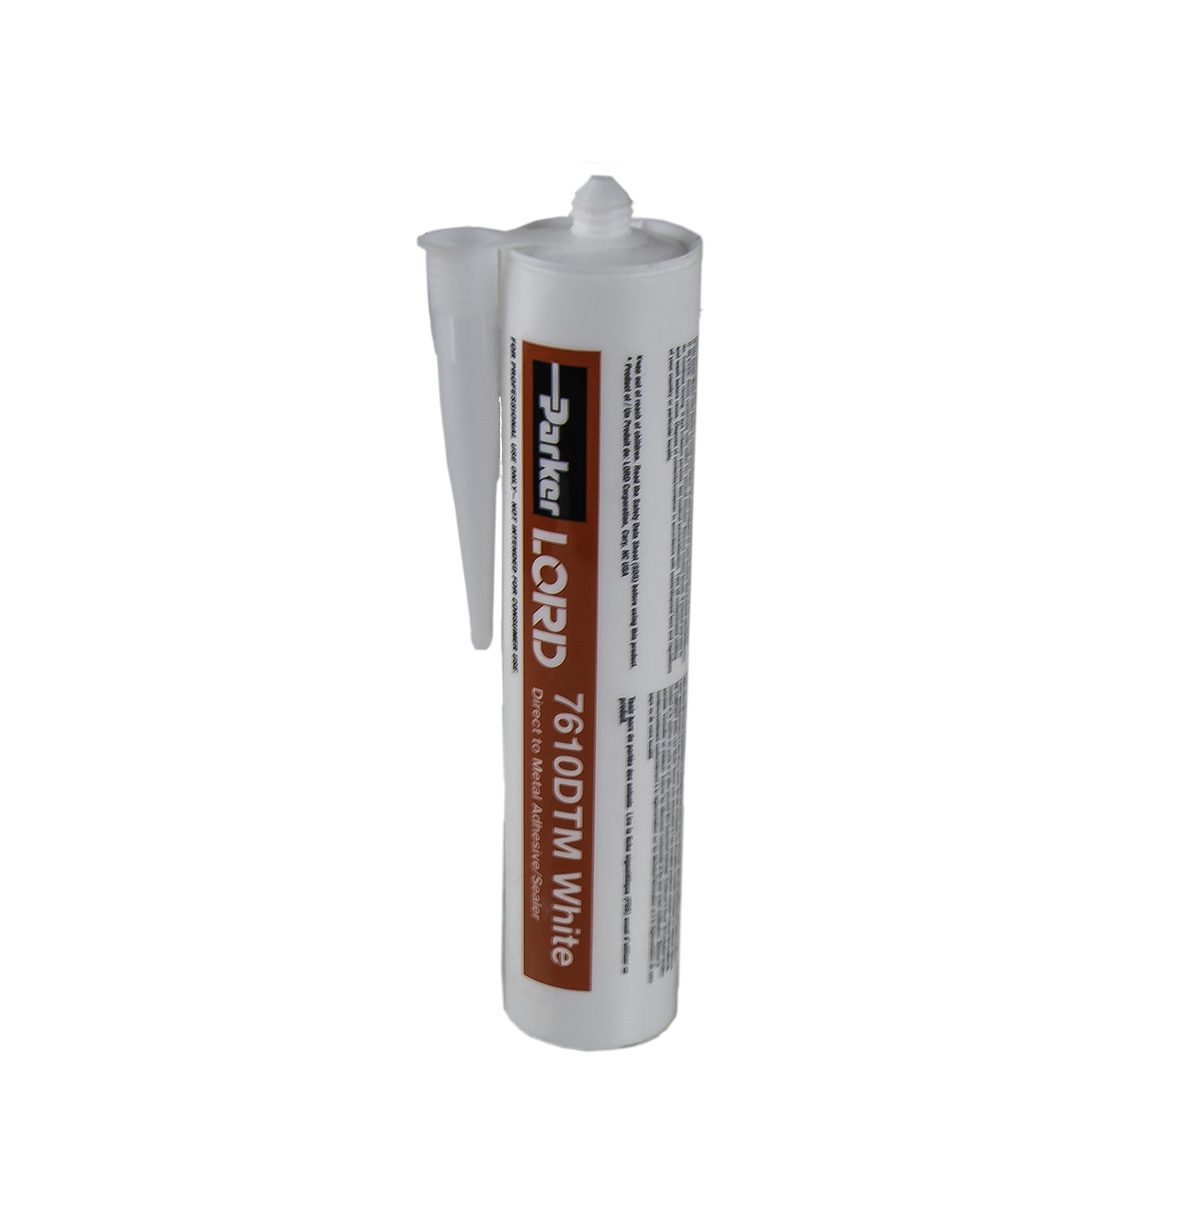
UltraLok® 300 MMA Structural Adhesive – Plastics, Composites & Metals
SKU CCA-UL300 Our Price Starting at $21.50 View ProductUltraLok® 300 MMA Structural Adhesive – Plastics, Composites & Metals
5-minute MMA adhesive for plastics, composites & metals. High-strength, flexible bonds with 3–6 min working time and 10–15 min fixture.
Our Price Starting at $21.50 -

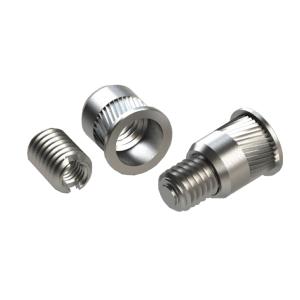
Deform-Nut TC/DM Honeycomb Anchoring System – Imperial Thread
SKU SPE-TC/DM10XZI-P1 Our Price Starting at $3.15 View ProductDeform-Nut TC/DM Honeycomb Anchoring System – Imperial Thread
1/4-20 threaded insert for honeycomb and sandwich panels. Fits 3/8″–1″ total panel thickness. Single-side installation — no backside access needed. Sold individually.
Our Price Starting at $3.15 -

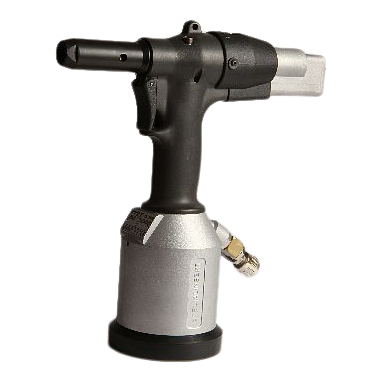
Specialinsert Deform-nut Riv-Nut Battery Tool GO-RN1 TC/SC for Honeycomb Panels
SKU SPE-DNINS-B-TCSC Our Price Starting at $869.96
You save View ProductSpecialinsert Deform-nut Riv-Nut Battery Tool GO-RN1 TC/SC for Honeycomb Panels
Our Price Starting at $869.96
You save -

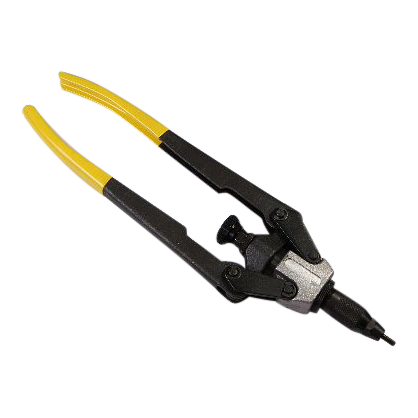
Manual Rivet Tool for Deform-Nut TC/SC1 (TC/DM)
SKU SPE-DNINS-M Our Price Starting at $208.88
You save View ProductManual Rivet Tool for Deform-Nut TC/SC1 (TC/DM)
Durable, ergonomic rivet-nut tool designed for quick installation of Deform-Nut TC/SC1 honeycomb panel fasteners.
Our Price Starting at $208.88
You save -

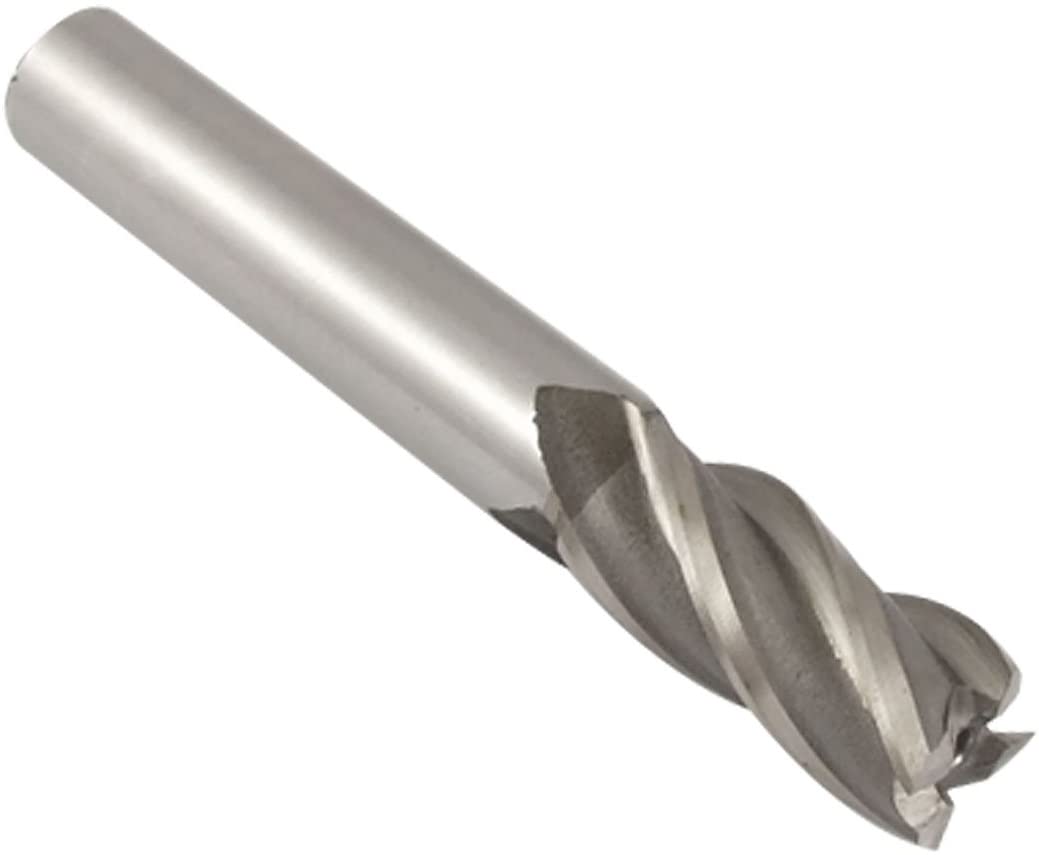
13mm Pre-Drill Cutter Bit for Deform-Nut TC/SC1 Honeycomb Fasteners
SKU CCH-MCBIT-13MM Our Price Starting at $31.45
You save View Product13mm Pre-Drill Cutter Bit for Deform-Nut TC/SC1 Honeycomb Fasteners
Precision 13mm HSS cutter bit for drilling honeycomb panels when installing Deform-Nut TC/SC1 fasteners.
Our Price Starting at $31.45
You save


Featured Products
-
UltraLok® 9102 A/B Panel Bonding Epoxy
Ultralok 9102 epoxy adhesive is engineered for strong, reliable honeycomb and composite panel bonding with fire safety and thermal resistance.
Our Price Starting at $90.16 -
CarbonBar Versatile Flat Stock
Cut and drill like wood. Support like steel. Replace heavy, expensive custom metal fabrication with aerospace-grade carbon fiber structural blanks.
- 4X stronger & 5X lighter than steel.
- Customize on-site with standard carbide tools.
- 100% weatherproof and corrosion-proof.
↑ Select your Bar Length and Profile above ↑
Our Price Starting at $25.00 -

Chem-Set VST M1V38 Male High Bond Tape Fastener – M1-V38-1/4-20×1″
SKU CCH-M1V38-1/4-20X1P Our Price Starting at $1.78
You save View ProductChem-Set VST M1V38 Male High Bond Tape Fastener – M1-V38-1/4-20×1″
Our Price Starting at $1.78
You save


-
 Expert Support.
 -
 Same-Day Shipping.
 -
 50+ Years of Service
Chemical-Concepts is a leading supplier of adhesives, chemicals and hardware for nearly every market in the industrial, government and defense sectors. Whatever your industry, we have all the hardware and adhesives you need to hold things together and keep things in place.